Formation of a map (plan) of the territory |


|
|
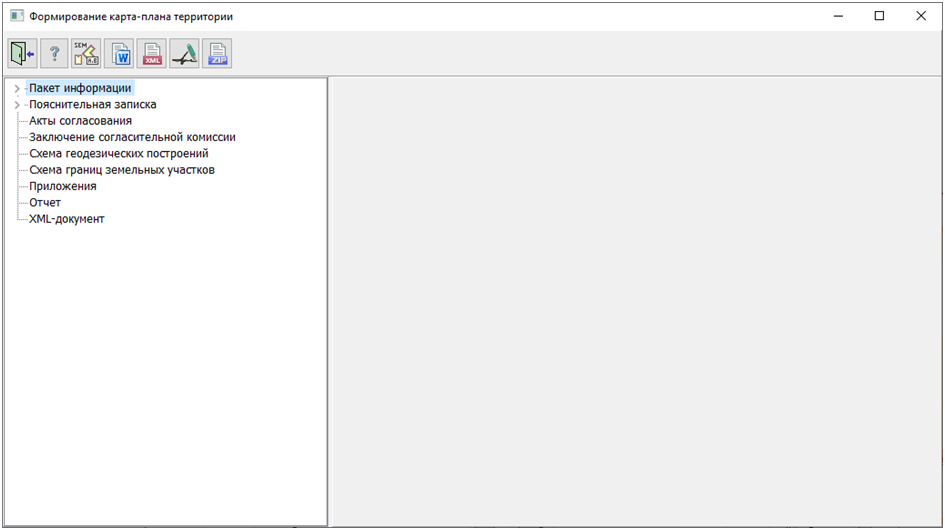
On the left side of the dialogue, there is a tree structure containing a list of sections where all necessary information for the formation of a site plan of the territory is displayed. The right side of the dialogue displays the content of the selected section in the tree.
At the top, there is a panel with buttons: — Close dialogue; — Help on program operation; — Edit attributes of cadastral objects; — Generate a site plan of the territory in DOC format; — Generate a site plan of the territory in XML format; — Sign documents with an electronic digital signature; — Generate a ZIP package containing the generated XML document and a set of attached files.
The initial initialization of the dialogue content is done with data from the digital cadastral map and from the cadastral works database. The cadastral map for the formation of the site plan of the territory must be prepared in accordance with recommendations. To launch the dialogue, press the «Generate site plan of the territory» button in the «Cadastral documents» panel and select an object on the map within which comprehensive cadastral works are being carried out.
After selecting an object, the program automatically sends a request to the Cadastral Works Database to check if one of the existing contracts is linked to the selected object. If there is no such linkage, a message appears on the screen suggesting to create a new contract. In case of refusal to create a new contract, a list of contracts contained in the database appears on the screen. You can choose one of the previously created contracts to link it to the selected map object. If the selected contract was previously linked to another object, a confirmation request for changing the linkage is displayed on the screen. Upon affirmative response, the linkage is made; upon negative response, the list of contracts reappears on the screen.
Upon launching the dialogue, data is read from the map and the Cadastral Works Database to populate the tree structure located on the left side. The tree contains the following sections: — information package; — explanatory note; — coordination acts; — conclusion of the reconciliation commission; — geodetic survey scheme; — land plot boundary scheme; — appendices; — report; — XML document.
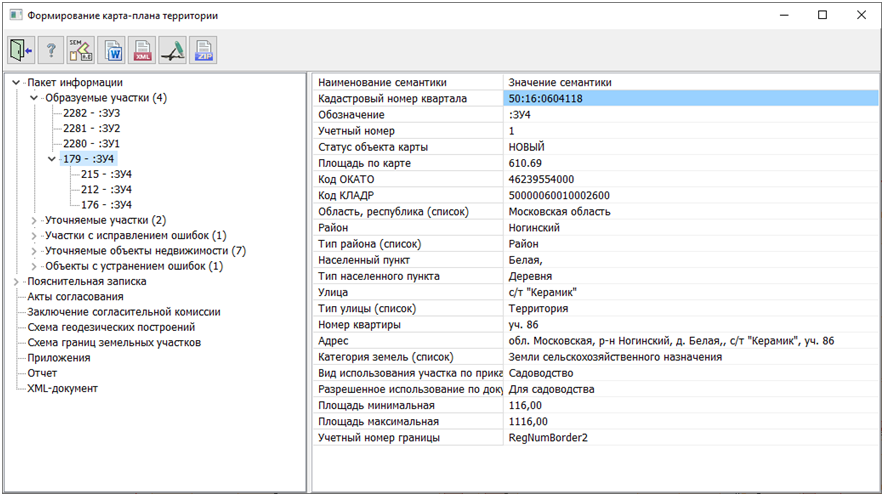
The «Information Package» section includes information about objects undergoing comprehensive cadastral works and has the following subsections: — formed plots; — clarified plots; — plots with error correction; — clarified real estate objects; — objects with error correction.
After the subsection name, the number of objects of that type contained within it is indicated in parentheses. Upon entering each subsection, lists of objects can be viewed. The object name in the list consists of two parts separated by a hyphen. The first part is the object number on the map. The second part is the designation (for formed objects) or cadastral number. If the object has multiple contours, the main contour is displayed in the list, and clicking on the «>» symbol opens a list of subordinate contours. When selecting an object in the list, the filled semantics of the selected object are displayed in the panel on the right. To edit the semantics of the object, press the button
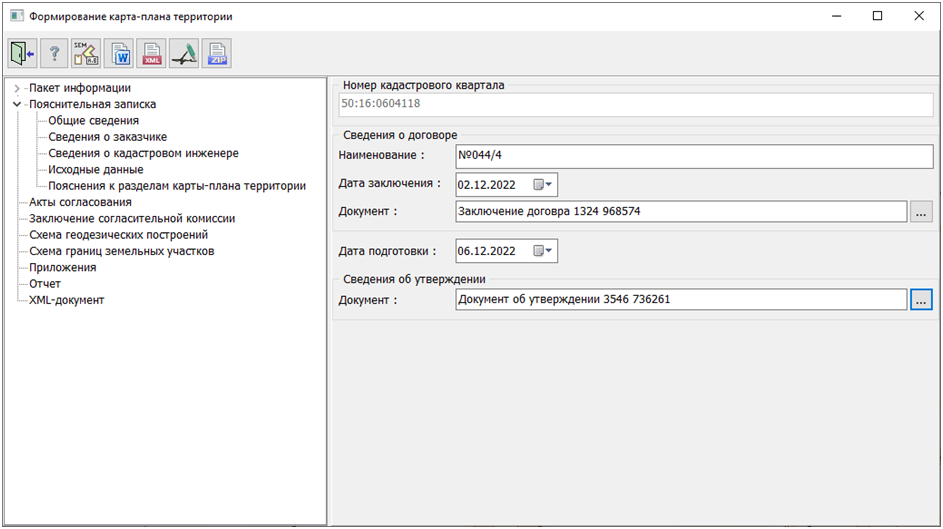
The section «Explanatory Note» contains information about the contract, the customer, cadastral engineers, and so on. It has the following subsections: — general information; — information about the customer; — information about the cadastral engineer; — initial data; — explanations for sections of the map-plan of the territory.
The subsection «General Information» contains information about which cadastral blocks comprehensive cadastral works are being carried out, information about the contract, and information about the date of preparation and the approving document of the map—plan of the territory. When selecting this subsection, fields appear on the right side of the dialogue that allow editing this data. The field «Cadastral Block Number» is not available for editing, serves an informational purpose, and is filled with data from the semantics of the map object that delineates the area where comprehensive cadastral works are being conducted.
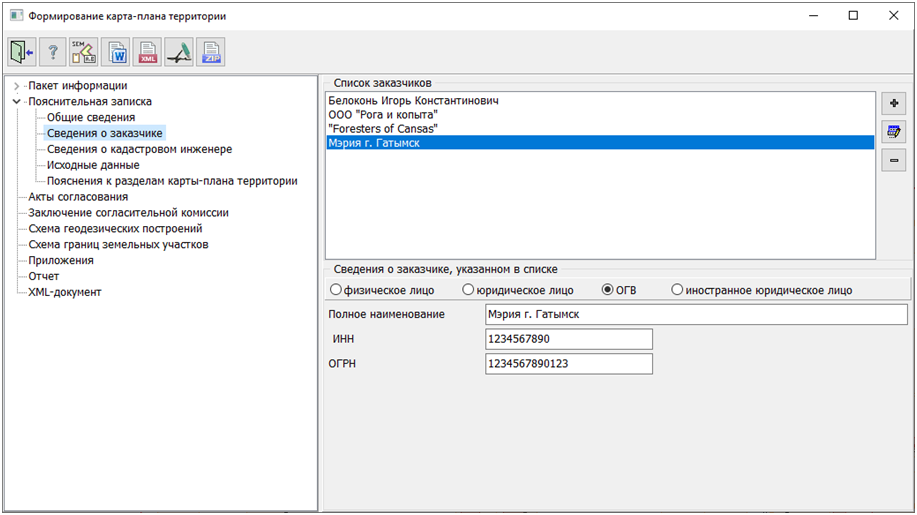
The subsection «Information about the customer» allows adding, editing, or deleting the customer of comprehensive cadastral works. When selecting this subsection, a list of customers appears on the right side of the dialogue, with fields containing information about the selected customer below it. Despite the fact that there can only be one customer for this type of work, typically representing a government authority, the dialogue includes a list of customers where any customer can be added. This is done for standardization with the «Cadastral Works Database» mode, where it is also possible to add any number of customers of any type to a contract. By creating a list there, it can be viewed here. However, in any case, when generating reports, the first customer on the list with the type «Government Authority» will be included.
The addition, deletion, and editing of customer information is carried out using buttons located to the right of the list.
The button The button The button
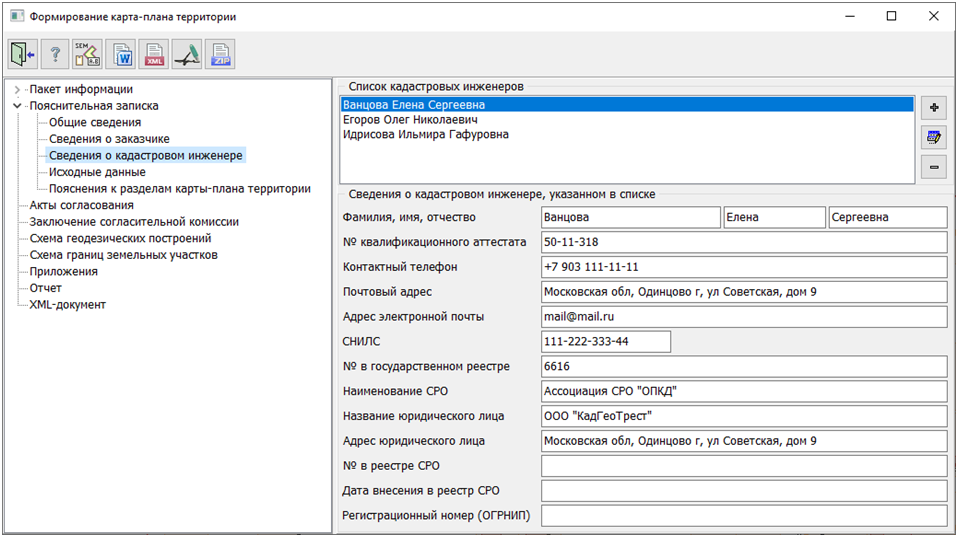
The subsection «Information about the cadastral engineer» allows for adding, deleting, and editing information about cadastral engineers. Upon selecting this subsection, a list of cadastral engineers added to the contract appears on the right side of the dialogue, with information about the selected engineer displayed below the list.
Adding, deleting, and editing information is done using buttons located to the right of the list. The button The button The button
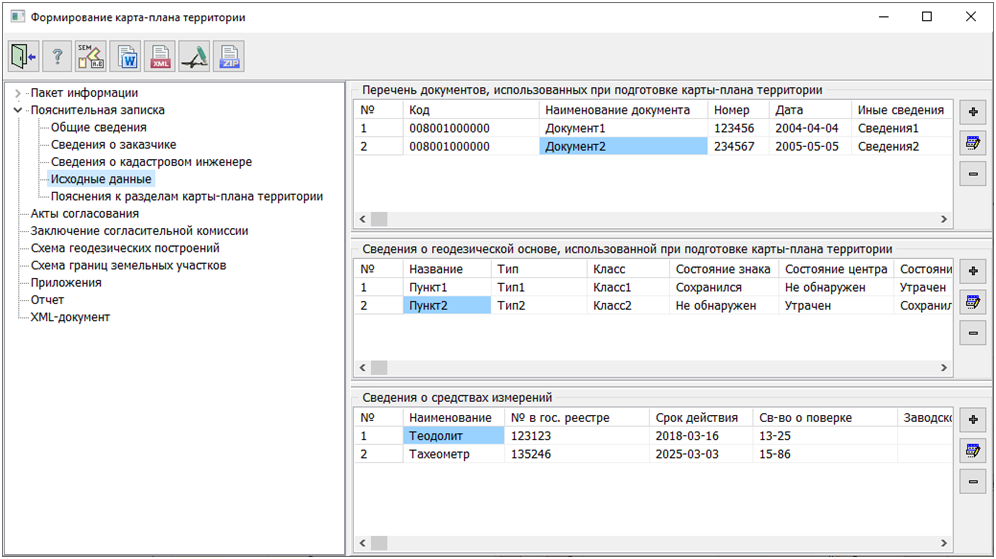
The subsection Source Data allows for maintaining lists of documents, geodetic network points, and measuring instruments. When selecting this subsection, three tables appear in the right part of the dialogue: — a list of documents used in preparing the territory map; — information about the geodetic base used in preparing the territory map; — information about measuring instruments.
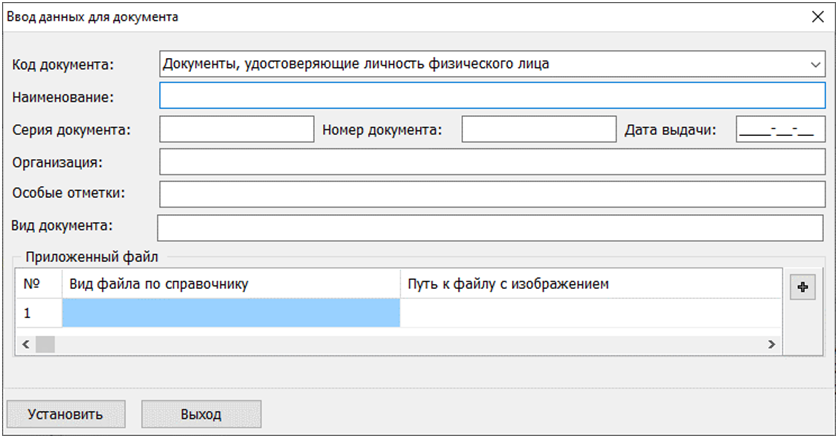
To the right of the table «List of documents used in preparing the territory map» are buttons that allow for adding, deleting, and editing documents. The button
When the button
The button
To the right of the table «Information about the geodetic basis used in preparing the territory map» are buttons that allow for adding, deleting, and editing geodetic network points. The button The button The button
To the right of the table «Information about measurement instruments» are buttons that allow for adding, deleting, and editing measurement instruments. The button The button The button
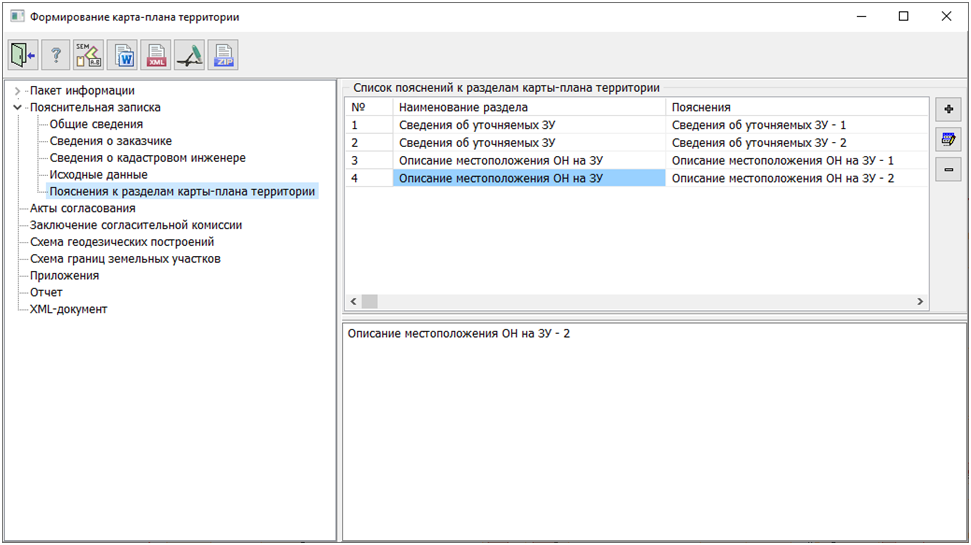
The subsection «Explanations for sections of the territory map» allows for maintaining a list of explanations for each section. When this subsection is selected, a table with a list is displayed on the right side of the dialogue. Below the table is a field displaying the full text of the explanation selected in the table. To the right of the table are buttons that allow for adding and deleting explanations, as well as editing the selected explanation from the table.
The button The button The button
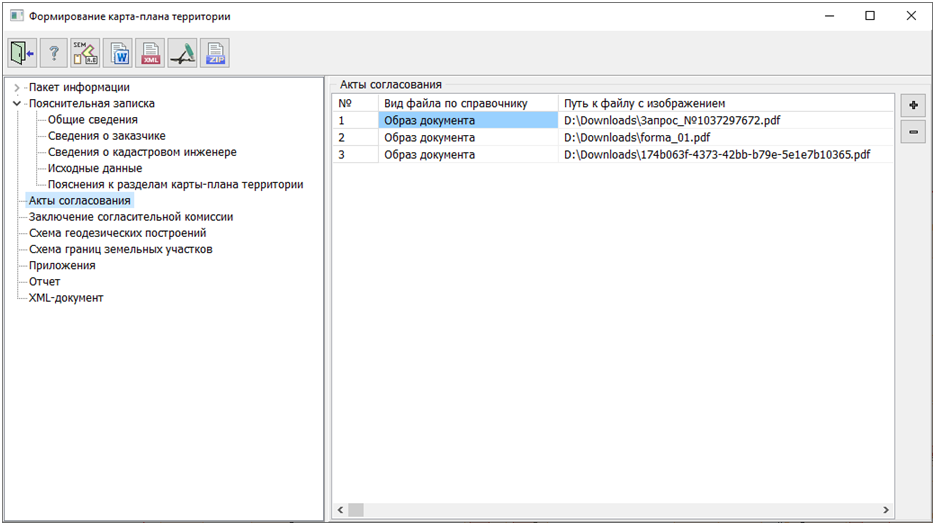
The sections Acts of Approval, Conclusion of the Reconciliation Commission, Geodetic Construction Schemes, and Land Plot Boundary Schemes allow for maintaining lists of files that represent images of the corresponding documents used in conducting comprehensive cadastral work. When selecting these sections, a table with a list of PDF files is displayed on the right side of the dialogue. To the right of the table are buttons for adding files to the table and deleting files from the table.
The button
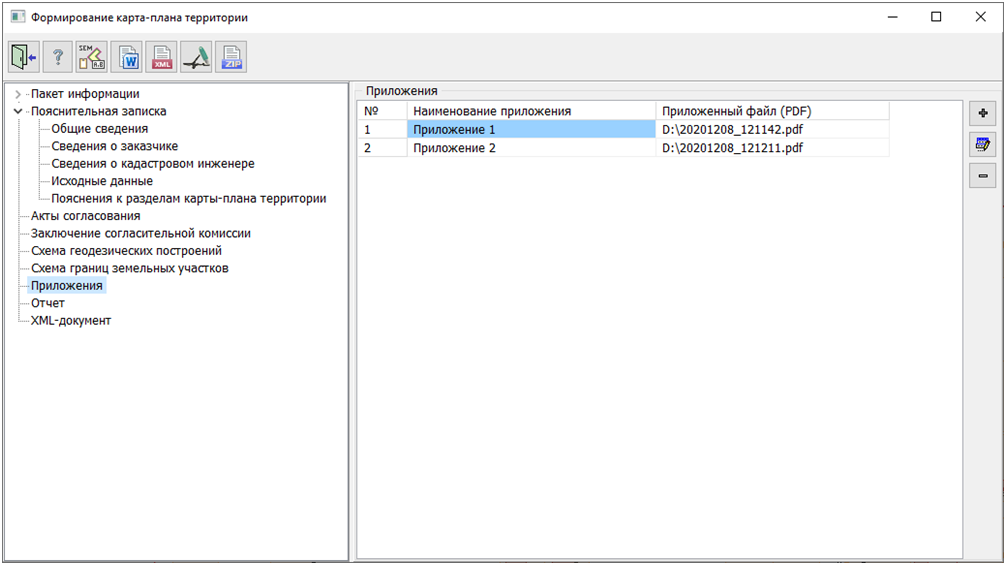
The Attachments section is designed to maintain a list of attached files in PDF format. When this section is selected, a table with attachments is displayed on the right side of the dialogue. Buttons for adding, deleting, and editing attachments are located to the right of the table.
The button The button The button
The Report section is designed to configure the generation of a text report. When this section is selected, fields appear on the right side of the dialog allowing you to specify the folders for storing report templates and the location of the report file. You can also choose the type of office suite there. During the report generation process, information reflecting the progress of the operation is displayed in the Log field.
The XML-document section is intended for configuring the generation of a document in XML format. When this section is selected, fields appear on the right side of the dialog allowing you to specify the folders for storing the XSD schema of the document and the location of the XML document file. Additionally, you can generate a new unique GUID identifier that will be used when forming the name of the XML document. Each time the dialog is launched, it is generated anew, but this can also be done manually by clicking the button
To generate a text report, you need to click the button To create an XML document, press the button If you need to digitally sign the generated XML document, you can do so by clicking the button To create a ZIP archive containing the generated XML document and a set of documents included in it, click the button |
 The dialogue