To save the image for a graphic part of the land-plan |


|
|
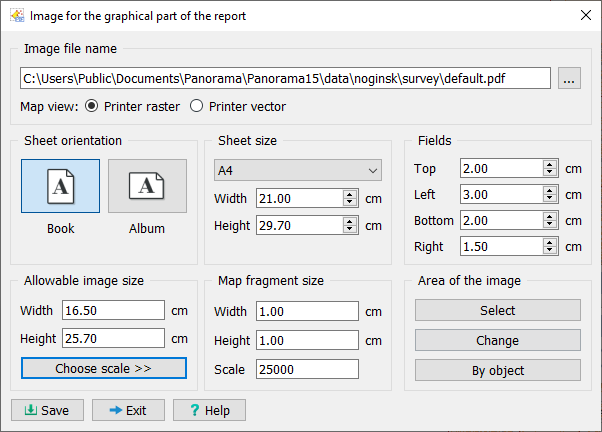
After calling the mode, the Images for graphic part of report dialog appears.
This dialog is designed for visual control of the dimensions of the created image. The Allowable image size group displays the width and height of the available area in a document of the specified format with the indicated margins, while the Map fragment size group displays the width and height of the created image for the specified scale.
By controlling the print sheet orientation, its dimensions and margins, you can change the allowable image dimensions and ensure that your selected fragment fits within this area. Management of these parameters should be performed in accordance with the dimensions of the report form templates you have available.
To select a map fragment, you need to press the Select button, then use the mouse to indicate a rectangular area on the map. The Images for graphic part of report dialog will open again, and its elements will be initialized with corresponding values.
The Modify button is designed for moving and resizing the selected fragment. To finish the selected fragment resizing mode, you need to press the "space" key. Selection and modification of the fragment can be performed multiple times.
Map view element: — Printer vector — for outputting only vector information; — Printer raster — for outputting vector, raster and matrix information, as well as geoportal images. |